Free Inquiry – Exploring the World of Watercolour…
My progression in my watercolour journey…
Why?
I chose to select watercolour painting as my inquiry project because, funny enough, I’ve been interested in getting into it as a hobby for a while! Now, this project is the perfect excuse to finally explore and learn all what watercolour is about. This inspiration of getting into watercolour came from my older sister, she always mentioned how peaceful and therapeutic she felt water colouring was for her, so here I am giving it a go!
Supplies
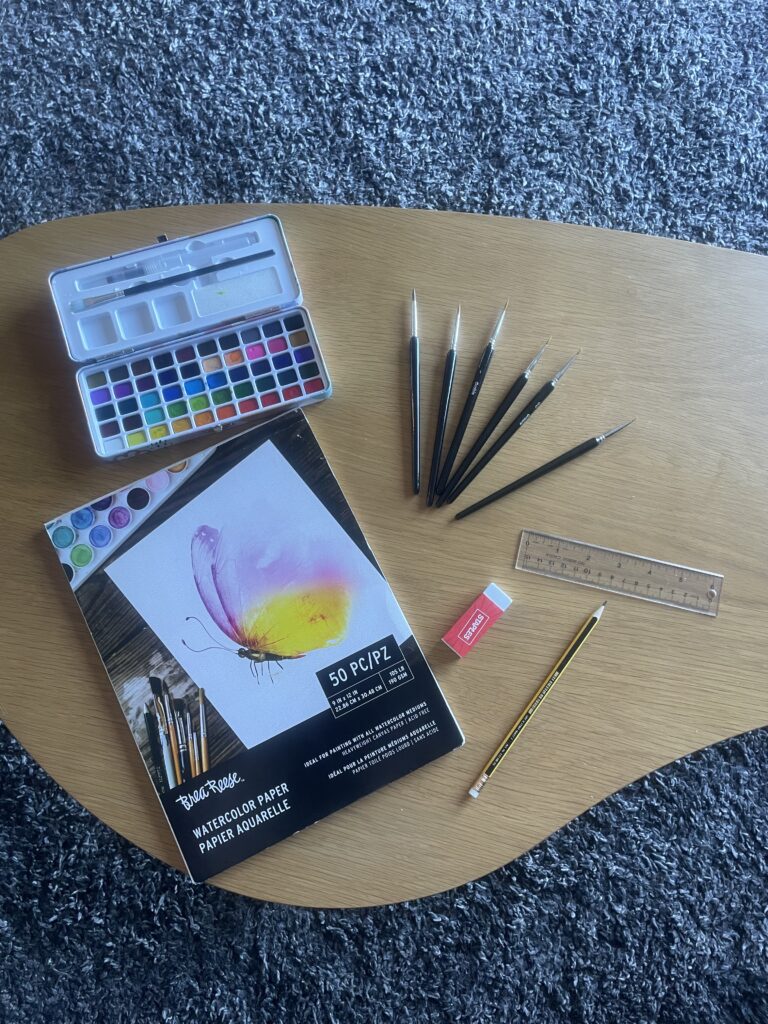
- Watercolour paint set
- Watercolour paper
- Watercolour brushes (of various sizes)
- Ruler
- Pencil
- Eraser
Free Inquiry Reflection #1 – Getting Started
What?
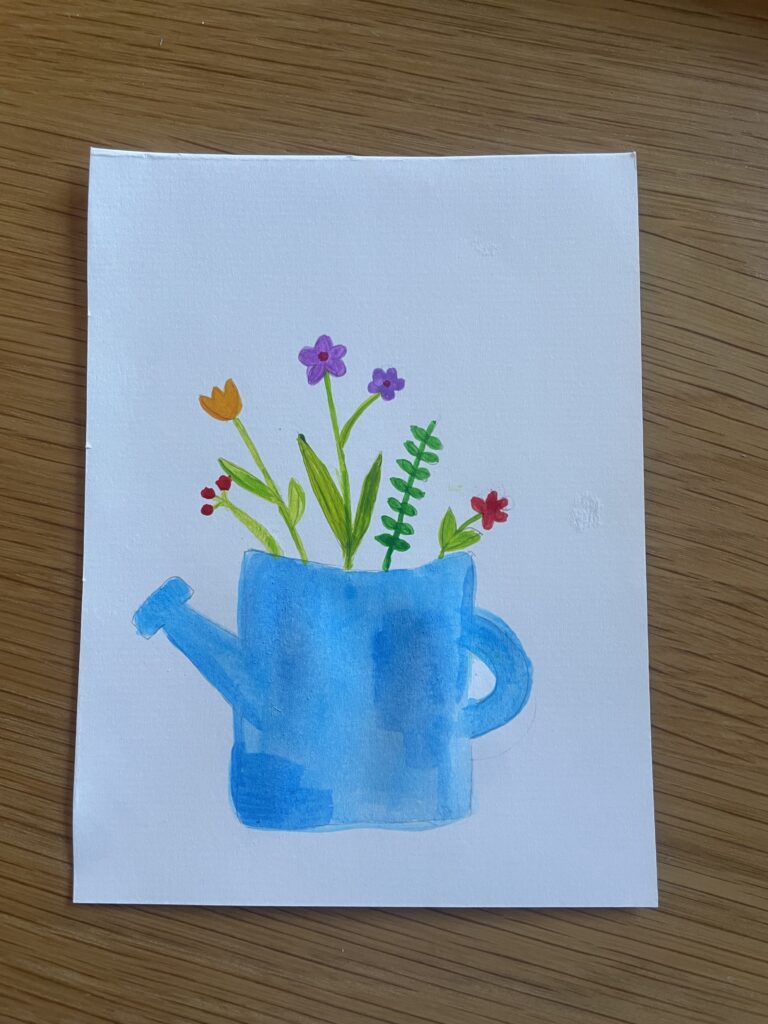
I began my first inquiry project my doing some research in making sure I was prepared and knew how I could find success in my project journey. Throughout my research I found an awesome website called Painting with Watercolors for Beginners. This website did a great job of laying out the supplies needed, colour mixing processes as well as contouring diverse shapes.
Once I did my research I was ready to begin my first watercolour piece. I began by going to Pintrest and searching ‘watercolour painting ideas easy for beginners’ to get some inspiration. Through this I found a blossoming water pail image that I believed would be a great beginning image to focus on. Above you can see my attempt at such art.
So What?
I Learnt:
- The importance of sketching lightly with my pencil as the markings pop through the lighter coloured paint
- Smaller sized paint brushes are easier to work with as you can always go larger with strokes but once the colour is on the page you can not erase the mistakes
- This is a very calming activity after a long day of looking at the computer screen and completing school work
My Struggles:
- In picking colours that would compliment each other
- Finding the right consistence in the paint (not too runny or solid)
My Strengths:
- I feel I did a good job mimicking the image I found on Pintrest and the overall result turned out better then I thought it would
- I feel the prior research I did and my watching my sister water colour in the past it improved my beginning work
Now What?
My next steps moving forward throughout this project is to work on more complex images. I would like my next watercolour project to incorporate an image of a duck. With this comes working on my sketching of a duck. I am going to begin by following the step by step video I found on YouTube to create my next art piece.
https://www.youtube.com/watch?v=iU7bpb7EFSY
Free Inquiry Reflection #2 – Ducking Along
What?
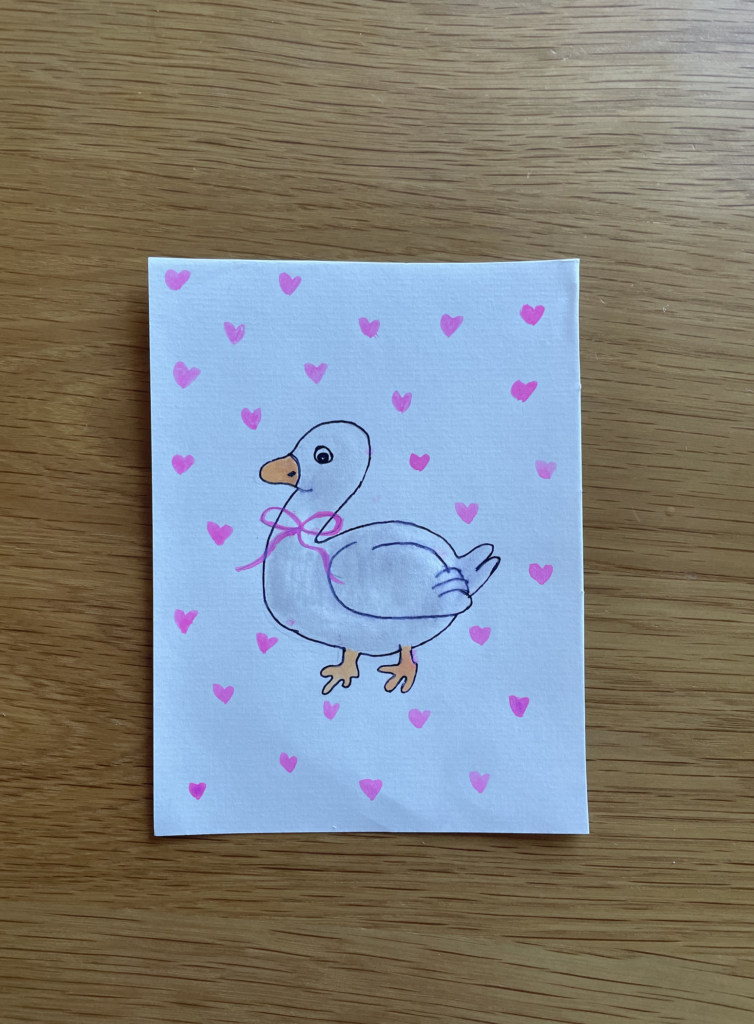
I began my second reflection on my watercolour journey by drawing along with the youtube video I attached above. Although the video said it was an “easy duck drawing,” I had two attempts and still do not necessarily feel happy with the outcome of my drawing. Once I completed my drawing I traced it with a fine tip marker before going to Pintrest to get inspiration for my following creation. I searched ‘watercolour painting with a duck’ and found a bowtie duck that fit my vision perfectly.
So What?
I Learnt:
- The importance of tracing with black fine liner marker after the watercolour part is done as the black lines seemed to bleed into the water colour paint
- How to draw a duck and all though not my proudest drawing, it is not the worst
My Struggles:
- I defiently struggled in sketching my duck drawing especially when it came to the wing and feet
- With struggling to sketch the duck I had to erase a lot which meant I had to be careful not to effect the watercolour paper (as watercolour is very tranparent).
My Strengths:
- I am proud that I mixed colours together to make the shade the ducks body is.
- I also am proud that I did not perfectly copy the Inspiration picture and added my own special touch
Now What?
Moving forward I would like to have a fall themed painting as we get. into this beautiful autume weather. With saying this I would like to incorporate working on more complex images with shading effect as I more forward with my images. I will watch this youtube video on shading attached below before working on my next art piece.
Free Inquiry Reflection #3 – A Truck Full of Fall
What?
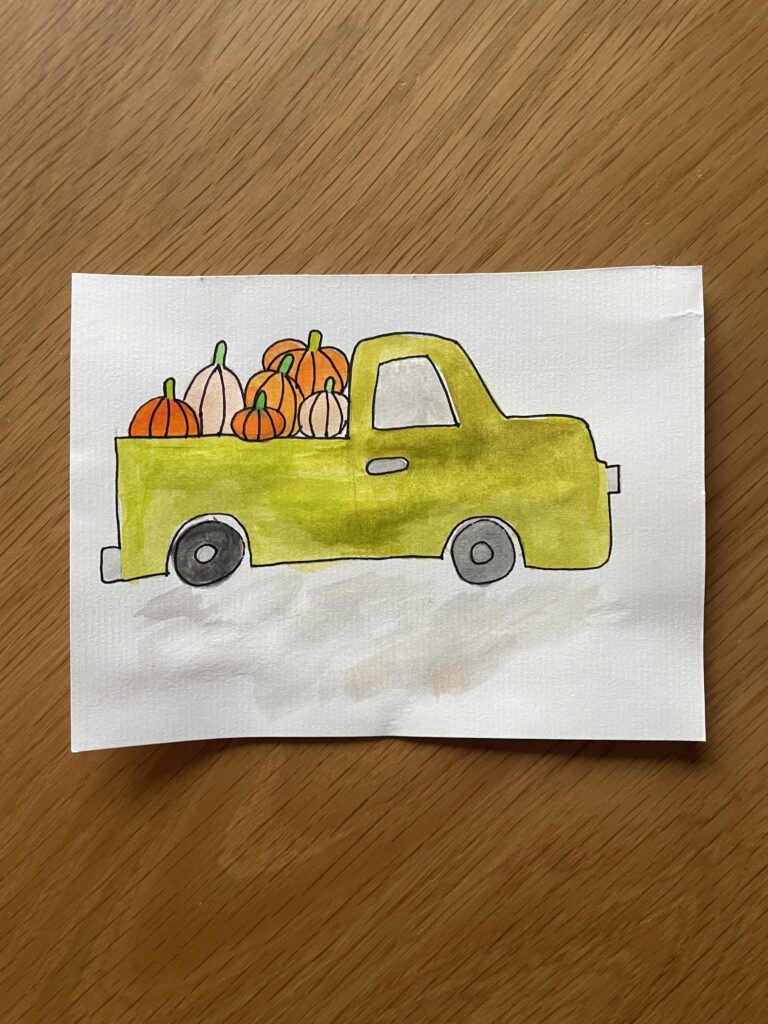
This is my third art piece and I am beginning to get in the groove of working with this form of paint. I am finding that I am looking forward to creating new images. For this piece, I followed a fall inspired piece I found through Pintrest. Overall, I am pretty happy with how my art is coming together and am thoroughly enjoying this process.
So What?
I Learnt:
- The importance of mixing colours. For example with the pumpkins, I did not want them to all look the same shade therefore, I played with the colours in creating various shades.
- How important it is to not put too much or too little water on your paintbrush. I need to remember to test my paintbrush on a scrap paper before putting it on my art work.
My Struggles:
- I had a hard time with mixing colours to get the shade of green I wanted for the truck. I originally started with a lighter shade of green but had difficulties recreating the same shade therefore led to this darker olive green shade.
- I have a hard time being okay with my painting being messier looking. I like the look when I see others creations but I need to become more familiar and comfortable with everything not always being in the lines.
My Strengths:
- I feel very happy with my drawing and feeling like my drawings are improving each week.
- I like how my shading turned out under the truck and I feel the video on shading helped me to create this look.
Now What?
Moving forward, I would like to challenge myself by using up the entire page. I feel I have now got down single images but would like to start creating full images by creatively creating a cohesive image. Before beginning my next piece, I will watch this video on ‘how to create smooth watercolour backgrounds’. This way I will be better prepared when beginning my background journey.
Free Inquiry Reflection #4 – Into the Wilderness
What?
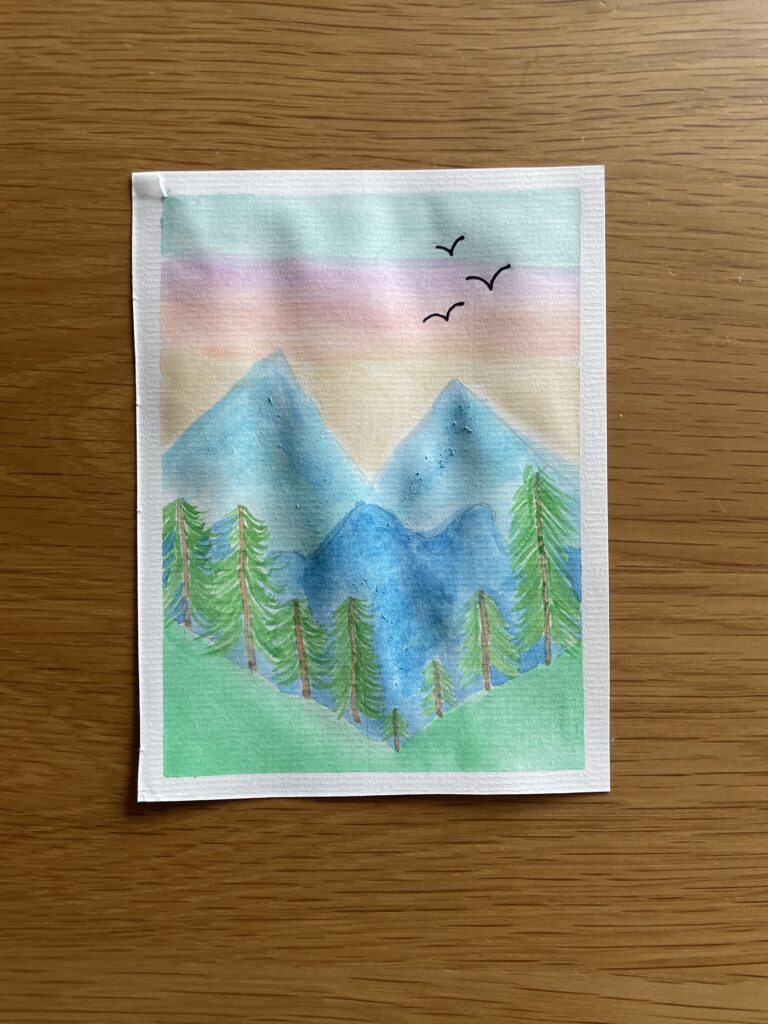
This scenery piece is now my forth piece although my first piece where I have used the entire page. The video I attached in my last post was super helpful in making smooth backgrounds and as this is mostly smooth background other then the trees, it was super applicable to my piece. In this youtube video the lady explains how putting masking tape around the edges of your paper can be super helpful as it helps your paper from folding up on the edges. She also mentions how important the concept of speed is to keep the background in looking cohesive. Lastly she adds a point on the value of prepping enough mixed paint, as it is so difficult to find the exact paint to water ratio again. I ran into this problem in my last piece and was happy to hear about this tip. This peice is inspired once again from Pintrest, where I searched ‘water colour ideas easy with backgrounds’ and found this beautiful scenery piece. Overall, I really enjoyed painting a full image although I feel I enjoy the small intricate work more.
Now What?
I Learnt:
- The importance of prepping enough mixed paint.
- How important speed is, as watercolour paint drys quite quickly.
My Struggles:
- I had difficulty painting the mountains as I had done the trees first so I was trying to get in the cracks of the branches. If I was to do something similar to this again, I would make sure to do all backdrops first and then place the trees on top.
- I also had a hard time with pressing down too hard when painting the mountains which ended up pilling some of the paper.
My Strengths:
- I am quite happy with how my sky sunset turned out and I feel all the colours thread together really nicely. I think the reason for this may have been the fact that I used the same base colour for each shade in the sky.
- I also am proud of how smooth the grass looks in my image. This is because I was quite fast as I painted this section (like what I learnt from the video).
So What?
Moving forward, I would like to do more card style paintings. I am choosing to do this because I believe this is something I can carry forward with me, whether it is making birthday, thank you, or congratulation cards. I am going to continue to apply the various concepts I have learnt from each of the videos above. I do not have a video to watch for this post and I want to continue to improve each of the skills I have learned up to this point, without adding more skills as of right now.
Free Inquiry Reflection #5 – Sailing Through the Semester
What?
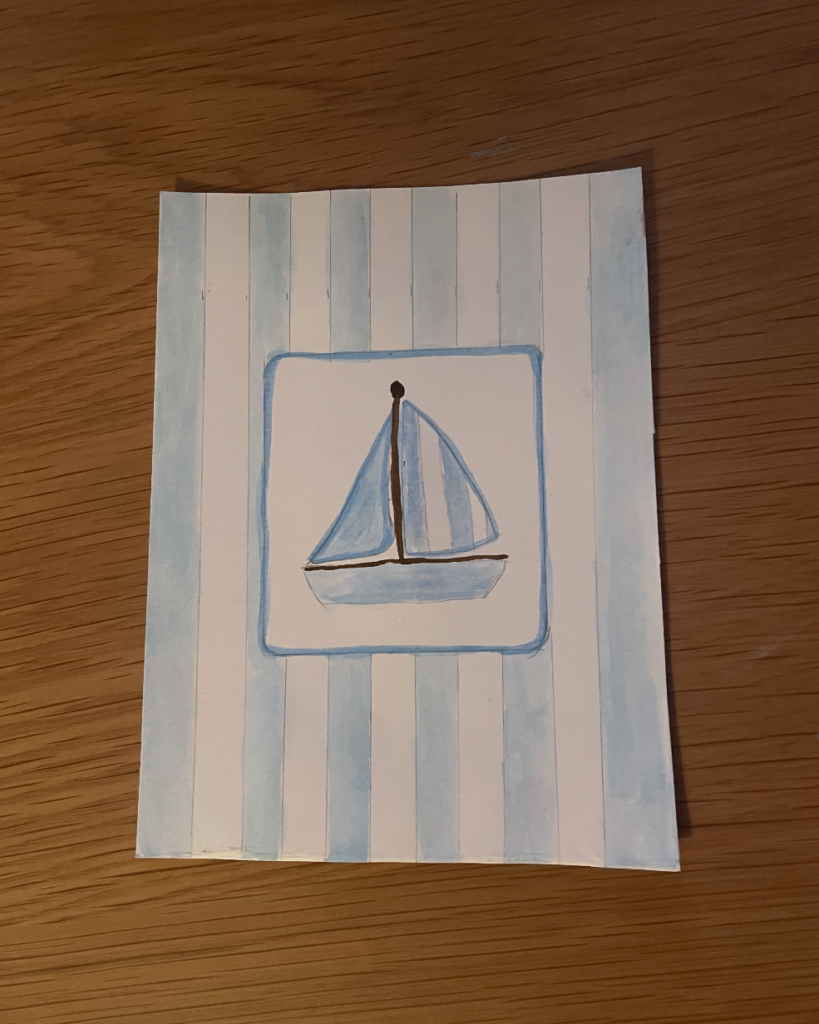
I wanted to switch my focus to potential card ideas I could make for loved ones in my life. This way I was able to take a time out from learning more skills and focus on perfecting the skills I have already learnt. This boat image was inspired from Pintrest. I thought it was super cute and I should give it a try. I am not going to lie, I had higher expectations for how this painting was going to turn out. I am pretty unhappy with the result but this is good because it means I have five more posts to perfect my work.
So What?
I Learnt:
- The Importance of outlining with darker colours to give dimension. When doing this is it important to paint the lighter colours first and follow with darker shade once the light once have dried.
- The value of knowing when to use thicker vs thinner brushes. For example for the background lines I used a thicker brush, whereas with the boat used my thinnest brush. This was super affective rather then simply using one brush for the whole painting.
My Struggles:
- I had a difficult time stying within the lines and this piece has very clear cut lines.
- I had a hard time covering up the pencil lines. Once again, I have to remind myself to sketch super light especially when working with lighter shades.
My Strengths:
- I did a good job of mixing up enough paint to supply my whole piece. By doing this the painting looks more cohesive as I did not have to recreate the exact shade I made prior.
- I am happy with my sketch of my painting. I feel like I did a good job of recreating the overall shape of the Pintrest image.
Now What?
Moving forward, I am going to continue along the journey of improving my painting skills. But most importantly, enjoy the process. Before my next project I am going to read this motivational article I found on the frustrations of water colour. Overall, lets keep things moving and see where we get. Most importantly, any effort is one step closer to perfection.
Free Inquiry Reflection #6 – City of Colour and Bloom
What?
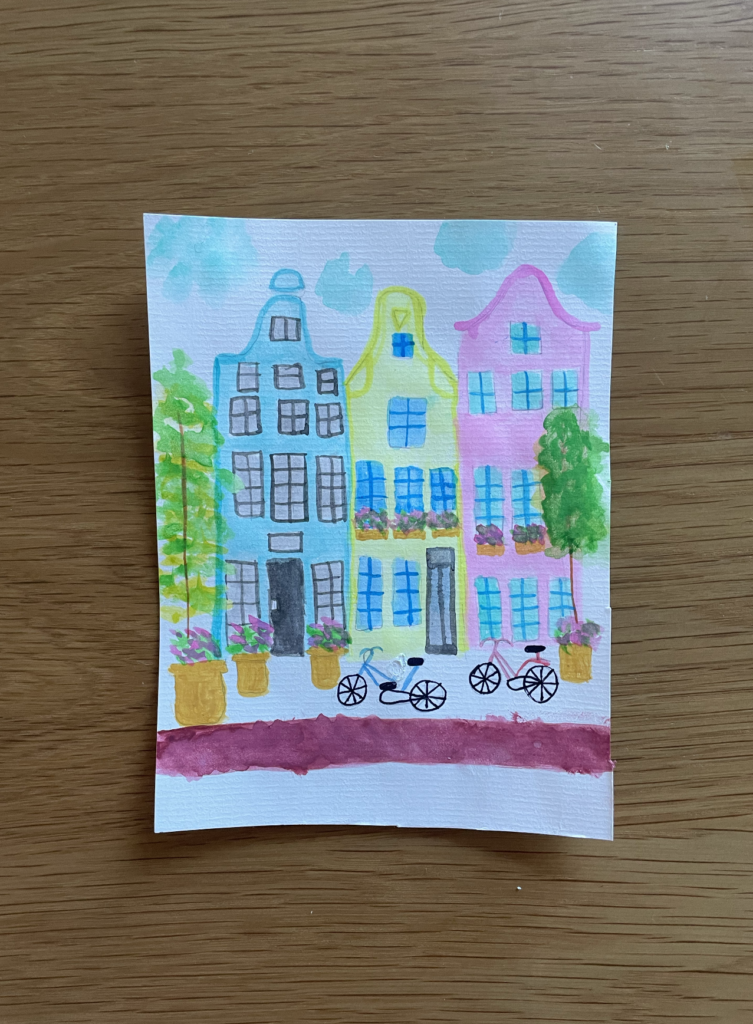
The street scene image I worked on today was probably my most complex art piece I have completed this far. It had many layers to it where I had to wait for parts to dry and come back and add more details later on. Overall I am very proud of this piece and although it is not perfect I am pretty happy with the turn out.
So What?
I Learnt:
- The benefit of outlining with a darker shade to add dimension to the buildings.
- I learnt how to draw a bike. I was not sure at first if I was going to get the image across but I feel it turned out pretty good.
My Struggles:
- I accidently drew a line on the bike I did not want, so I tried to erase it and it made it rip and look worse.
- I had a hard time making the buildings and windows look even but in the end I feel it added character.
My Strengths:
- I am very happy with how my trees and flower pots turned out. I feel it adds texture to the images and pulled the painting together.
- I am happy with the colour combinations. It feels very bright and happy.
Now What?
Moving forward, I would like to work on the difference of hard and soft lines in images. To apply these skills I will make my next project an image of a sunset. Below you will find a video on painting a water colour landscape. In this video they show us the importance of taping down your image, wetting the paper and placing tape to make hard vs soft lines.
Free Inquiry Reflection #7 – Golden Hour
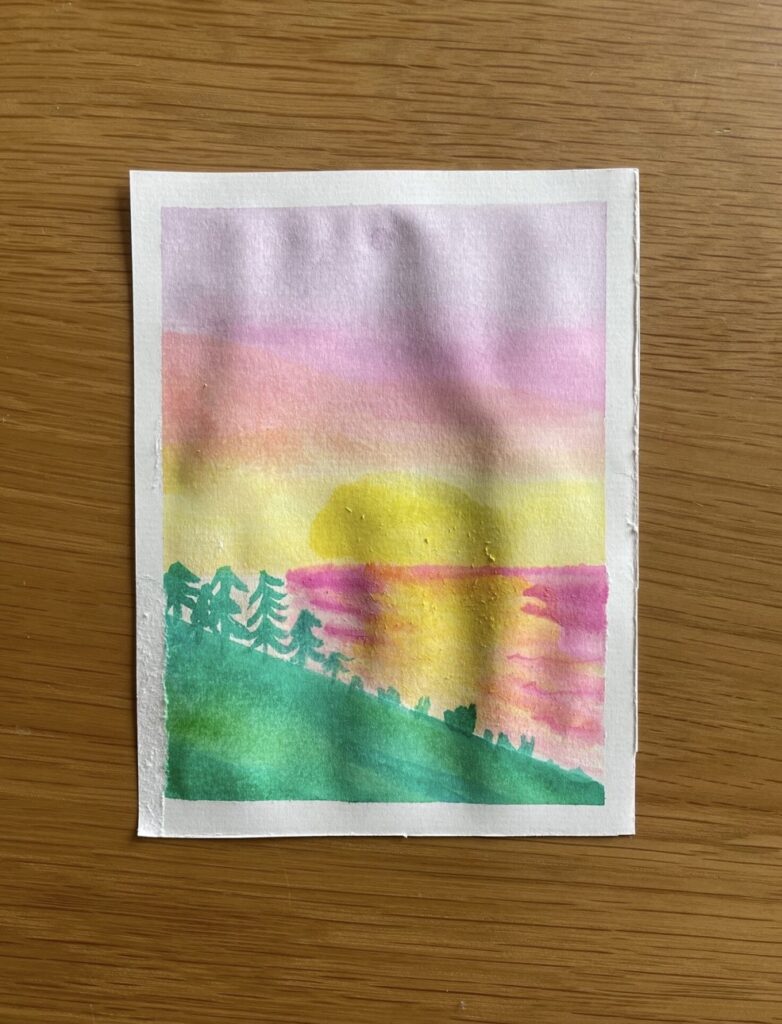
What?
Today I attempted a sunset that incorporated both hard and soft lines. This added dimension to my art and continued to challenge my art process. This image similar to the last image had many layers where I had to wait for it to dry before proceeding with the next layer. Overall I feel this image turned out pretty great!
So What?
I Learnt:
- the importance of layering to make colours more prominent. I did this with the sun to make it look brighter compared to the yellow in the sunset.
- to take the perimeter tape off very slowly. This makes it so the paper will not ripe. Although this is not too obvious I fixate on it and do not want it to happen again.
My Struggles:
- It was difficult to place the masking tape on a spot that was previously painted.
- Once again I struggled with the pilling of the paper. This keeps happening when I have multiple layers of wet paint and I press too hard with the brush. I will try to be more aware of this to limit this in my pieces.
My Strengths:
- I am most proud of the sunset that is reflecting on the water. At first it was difficult to make it look like water so I kept playing around with it. Overall, I feel it definitely does look like water and looks pretty cool!
- I also am happy with how the grass looks. It is so simple but I find it cool that I was able to show so many different colour greens blended together.
Now What?
Moving forward, I am going to go back to working on my drawings and hard line edges. I feel I have figured out the importance of soft line edges and need to work more on solid images. Through my drawing I want to work on adding character my using various shades of a colour and adding shadows where needed. I tried to find a video to support my process on solid edge lines but found it very difficult as most painter want all lines to look soft. I feel their art times where solid lines could be more beneficial. In saying this I am just going to do what I think and see where it takes me!
Free Inquiry Reflection #8 – French Pig
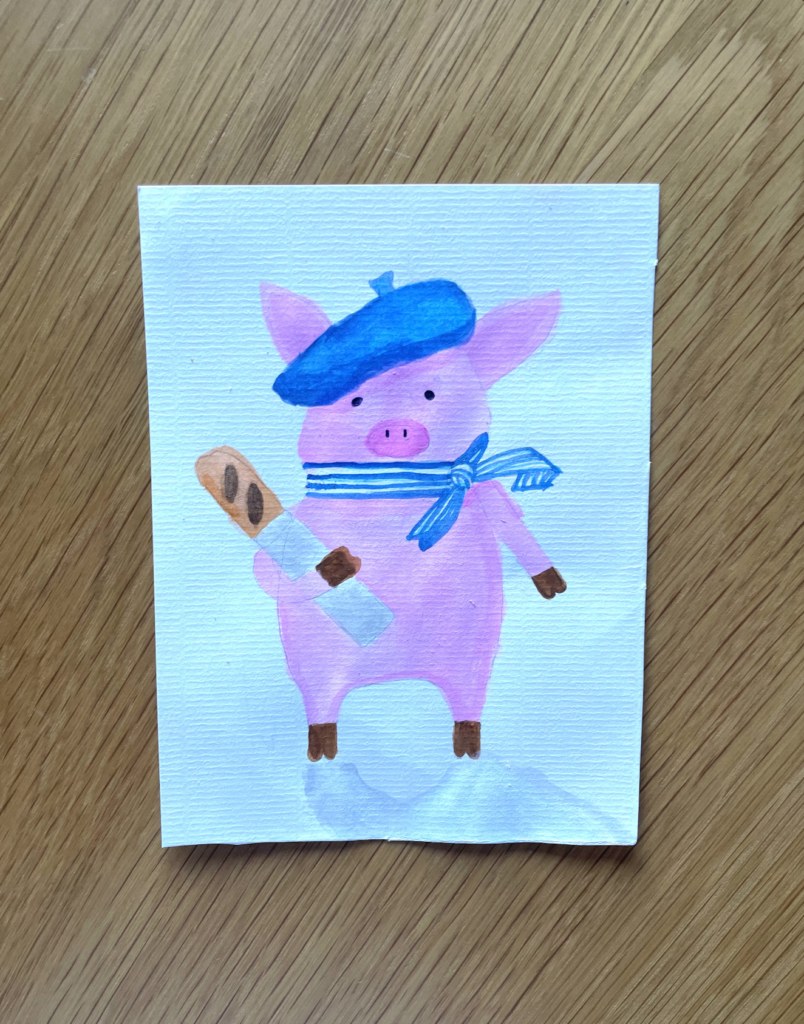
What?
I choose to go back to working on my hard lines and drawing work for this french pig piece. I am very happy with the turn out of my image. After completing this piece I was thinking back to my last animal drawing of the duck and looking back to my last drawing of the duck I can see great improvement in my drawing work. I feel this piece is one of my favourites I have completed this far (although I know I say this about most of my pieces).
So What?
I Learnt:
- Alot on the importance of shading not only the shadow at the bottom of the piece but I used shading on the pig body and the french hat.
- The importance of playing with multiple shades. Originally with this piece I began with much lighter shades and kept going until I got the shades I was happy with.
My Struggles:
- The most difficult part of this piece was drawing the outline of the image. I was very apprehensive when I had just seen my outline but once all the colour got added it turned out pretty well.
- It was hard to make the scarf look realistic but I feel in the end it turned out pretty well.
My Strengths:
- I am very happy with how the shadow turned out and I feel it looks quite realistic.
- Although it was difficult drawing the arm around the baguette I feel I did a good job of making it look real.
Now What?
Moving forward, I am going to work on hard lines, soft lines and drawing to combined all together. I am at a point now where I have watched many videos on technique and need to put all the skills to the test. In saying this, I did find one Tiktok video that will reminds me of the do’s and don’ts of watercolour painting. I will refer back to this video as I work on combining the techniques I have learnt up to this point.
Free Inquiry Reflection #9 – Hello, Autumn!
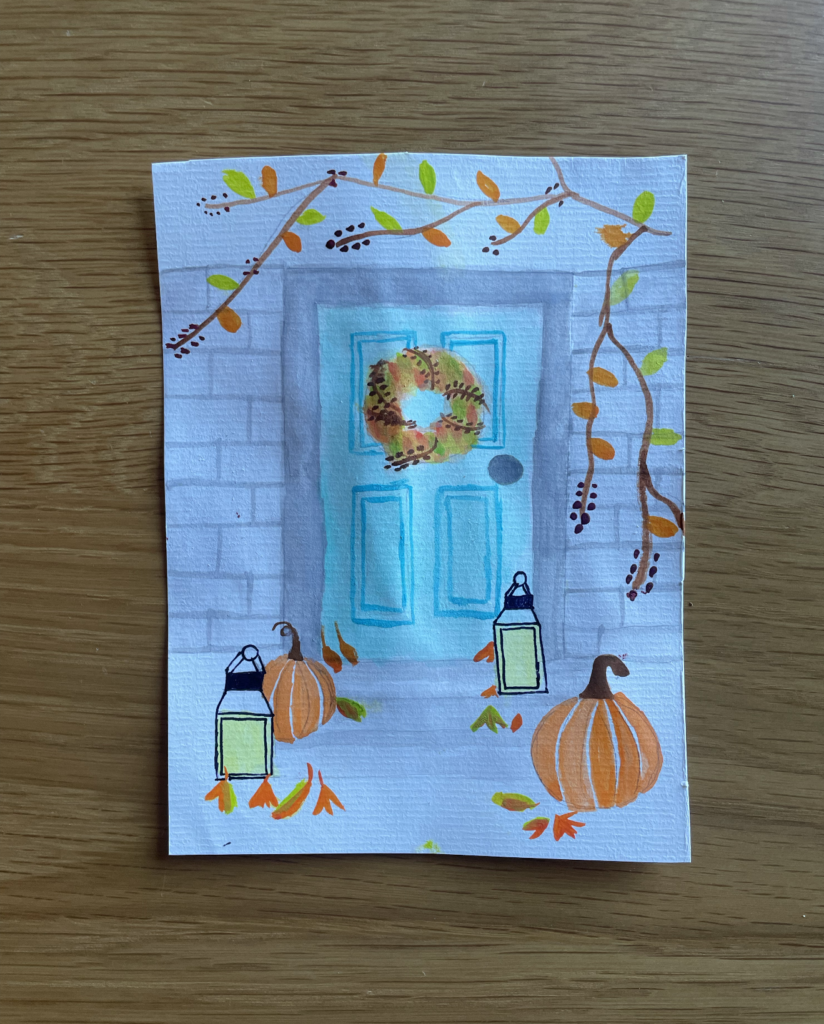
What?
The fall door image I worked on today was very complex and had many layers added to it. This image did not turn out the exact way I wanted it but I believe it still turned out beautifully. Although their are some piece that did not turn out exactly line the inspration I feel overall it is a beautiful finish to my insprational journey before I do my final piece simply from the mind and body.
So What?
I Learnt:
- The importance of angling the stairs from larger to smaller to show the bottom step from the top step. This also helped add dimension to the image.
- I learnt that you do not always have to completely paint the entire page for it to look complete. There are a lot of blank spaces but I feel the image looks complete!
My Struggles:
- I had a hard time with drawing the leaves
- I also had a difficult time drawing the lines on the door frame so in the end just painted it all a solid grey colour.
My Strengths:
- I am very happy with how my pumpkins turned out. I feel like the white space left between looks a lot better then outlining in black and added important detail.
- I like how the brick and stairs look with the two shades of grey. The shadows on the stairs did a great job of adding dimension to the image.
Now What?
Now I will be moving onto my final piece!! For this last piece I would like to let loose and paint whatever comes to mind without any piece of inspiration. I will do this by listening to my creativity, sounds around me and emotions I hold within me.
Free Inquiry Reflection #10 – The Road Home
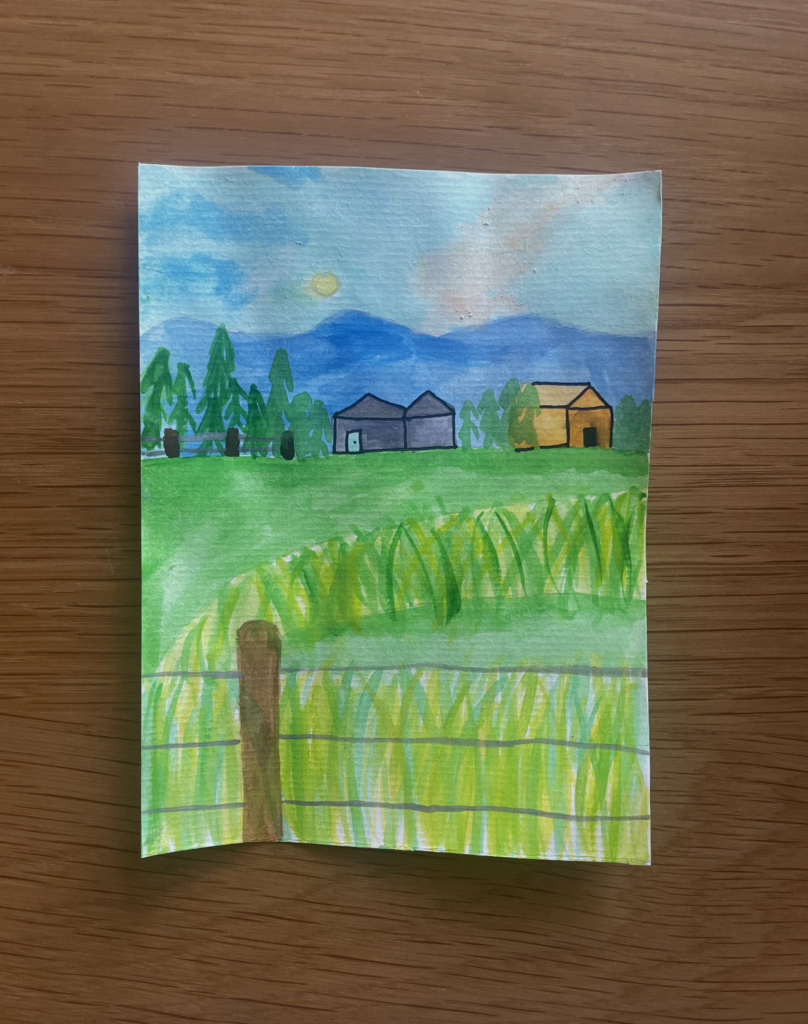
What?
This is my final painting for this inquiry project. As I mentioned in my last post, I wanted to challenge myself by not looking at a prior watercolour painting for inspiration, rather heading into the outdoors and creating myself. In saying this I am home for thanksgiving weekend, and I thought there was no better way than to connect my last painting to back home. I decided I would make it even more personal and create a piece of the road home to my house. This road holds a special place in my heart. It is an absolute beautiful spot out in the country of Port Alberni and when I travel down the road, I know I am going to meet my loved ones at the end.
So What?
I Learnt:
- The importance of perception. Especially in this image to show large sized images at the front compared to the back to show what is need to road verses far away.
- The importance of deciding what layers of paint need to go down first before others so they do not ruin the layers on top. For example, I had to do the mountains before I was able to complete the trees and houses.
My Struggles:
- I had a difficult time making my houses look three dimensional.
- I also struggled with finding an appropriate size for the trees to make them look realistic. Looking back, I believe I may have made them a bit too tall.
My Strengths:
- I am happy with how the grass looks with the diverse colours and stroke lines.
- I also am quite happy with how. the sky turned out. Although it was some trial and error with the colour contrast, I am very happy with the finished product.
Now What?
I am actually kind of sad this inquiry project has come to an end. I have enjoyed figuring out how I wanted to display this project on the word press software, what skills I wanted to learn in watercolour painting and what images I was going to attempt to create. I have decided moving forward I am going to continue my watercolour journey as I had fun playing with my creativity when still being relaxed doing it! I look forward to seeing where I can take this throughout my life.